
I am so excited to share the rest of my story on building a fireplace surround for our fireplace. As mentioned in an earlier post, I purchased an electric, wall-mount fireplace and installed it many months ago. I have been procrastinating for so long that I finally felt guilty enough to just get it done. Plus, the holidays were just around the corner and it would be so nice to have a beautiful, completed, fireplace wall to hang Christmas stockings on.
Sooooooooooooo……..here we go!
After building the frame and attaching Hardiebacker cement board (see previous post), I sponged water onto the Hardiebacker a few times to make sure the Hardiebacker wouldn’t suck the water out of the mortar before it got a chance to cure to full strength. As this was my first time using Hardiebacker, I was really surprised how much water it soaked up, and made me realize how important that step was. Immediately after that, I began applying mortar to the wall and back-buttering each tile, applying to the wall as I went. It went pretty quickly after I got the hang of it. I had previously cut all of the pieces which made the application MUCH smoother. I cut around the outlets for the tv once I got to that row.

I finished applying the tiles and patched the gauges I made in the ceiling when installing the wall frame.

I waited for the spackle to dry, then sanded it, and painted over it with ceiling paint.
I also took extra mortar and applied it between any cracks that didn’t look natural. The tiles got a little out of alignment in a couple places and there were larger-than-my-OCD-can-handle gaps, so I simply applied mortar using a plastic sandwich bag. If you’ve ever piped frosting onto a cake, this is exactly the same but with less perfection. I just filled the little bag with mortar and cut the tip off one of the bag corners and voila! DIY Mortar gap applicator!

It patched so nicely you need a magnifying glass to figure out where I patched!
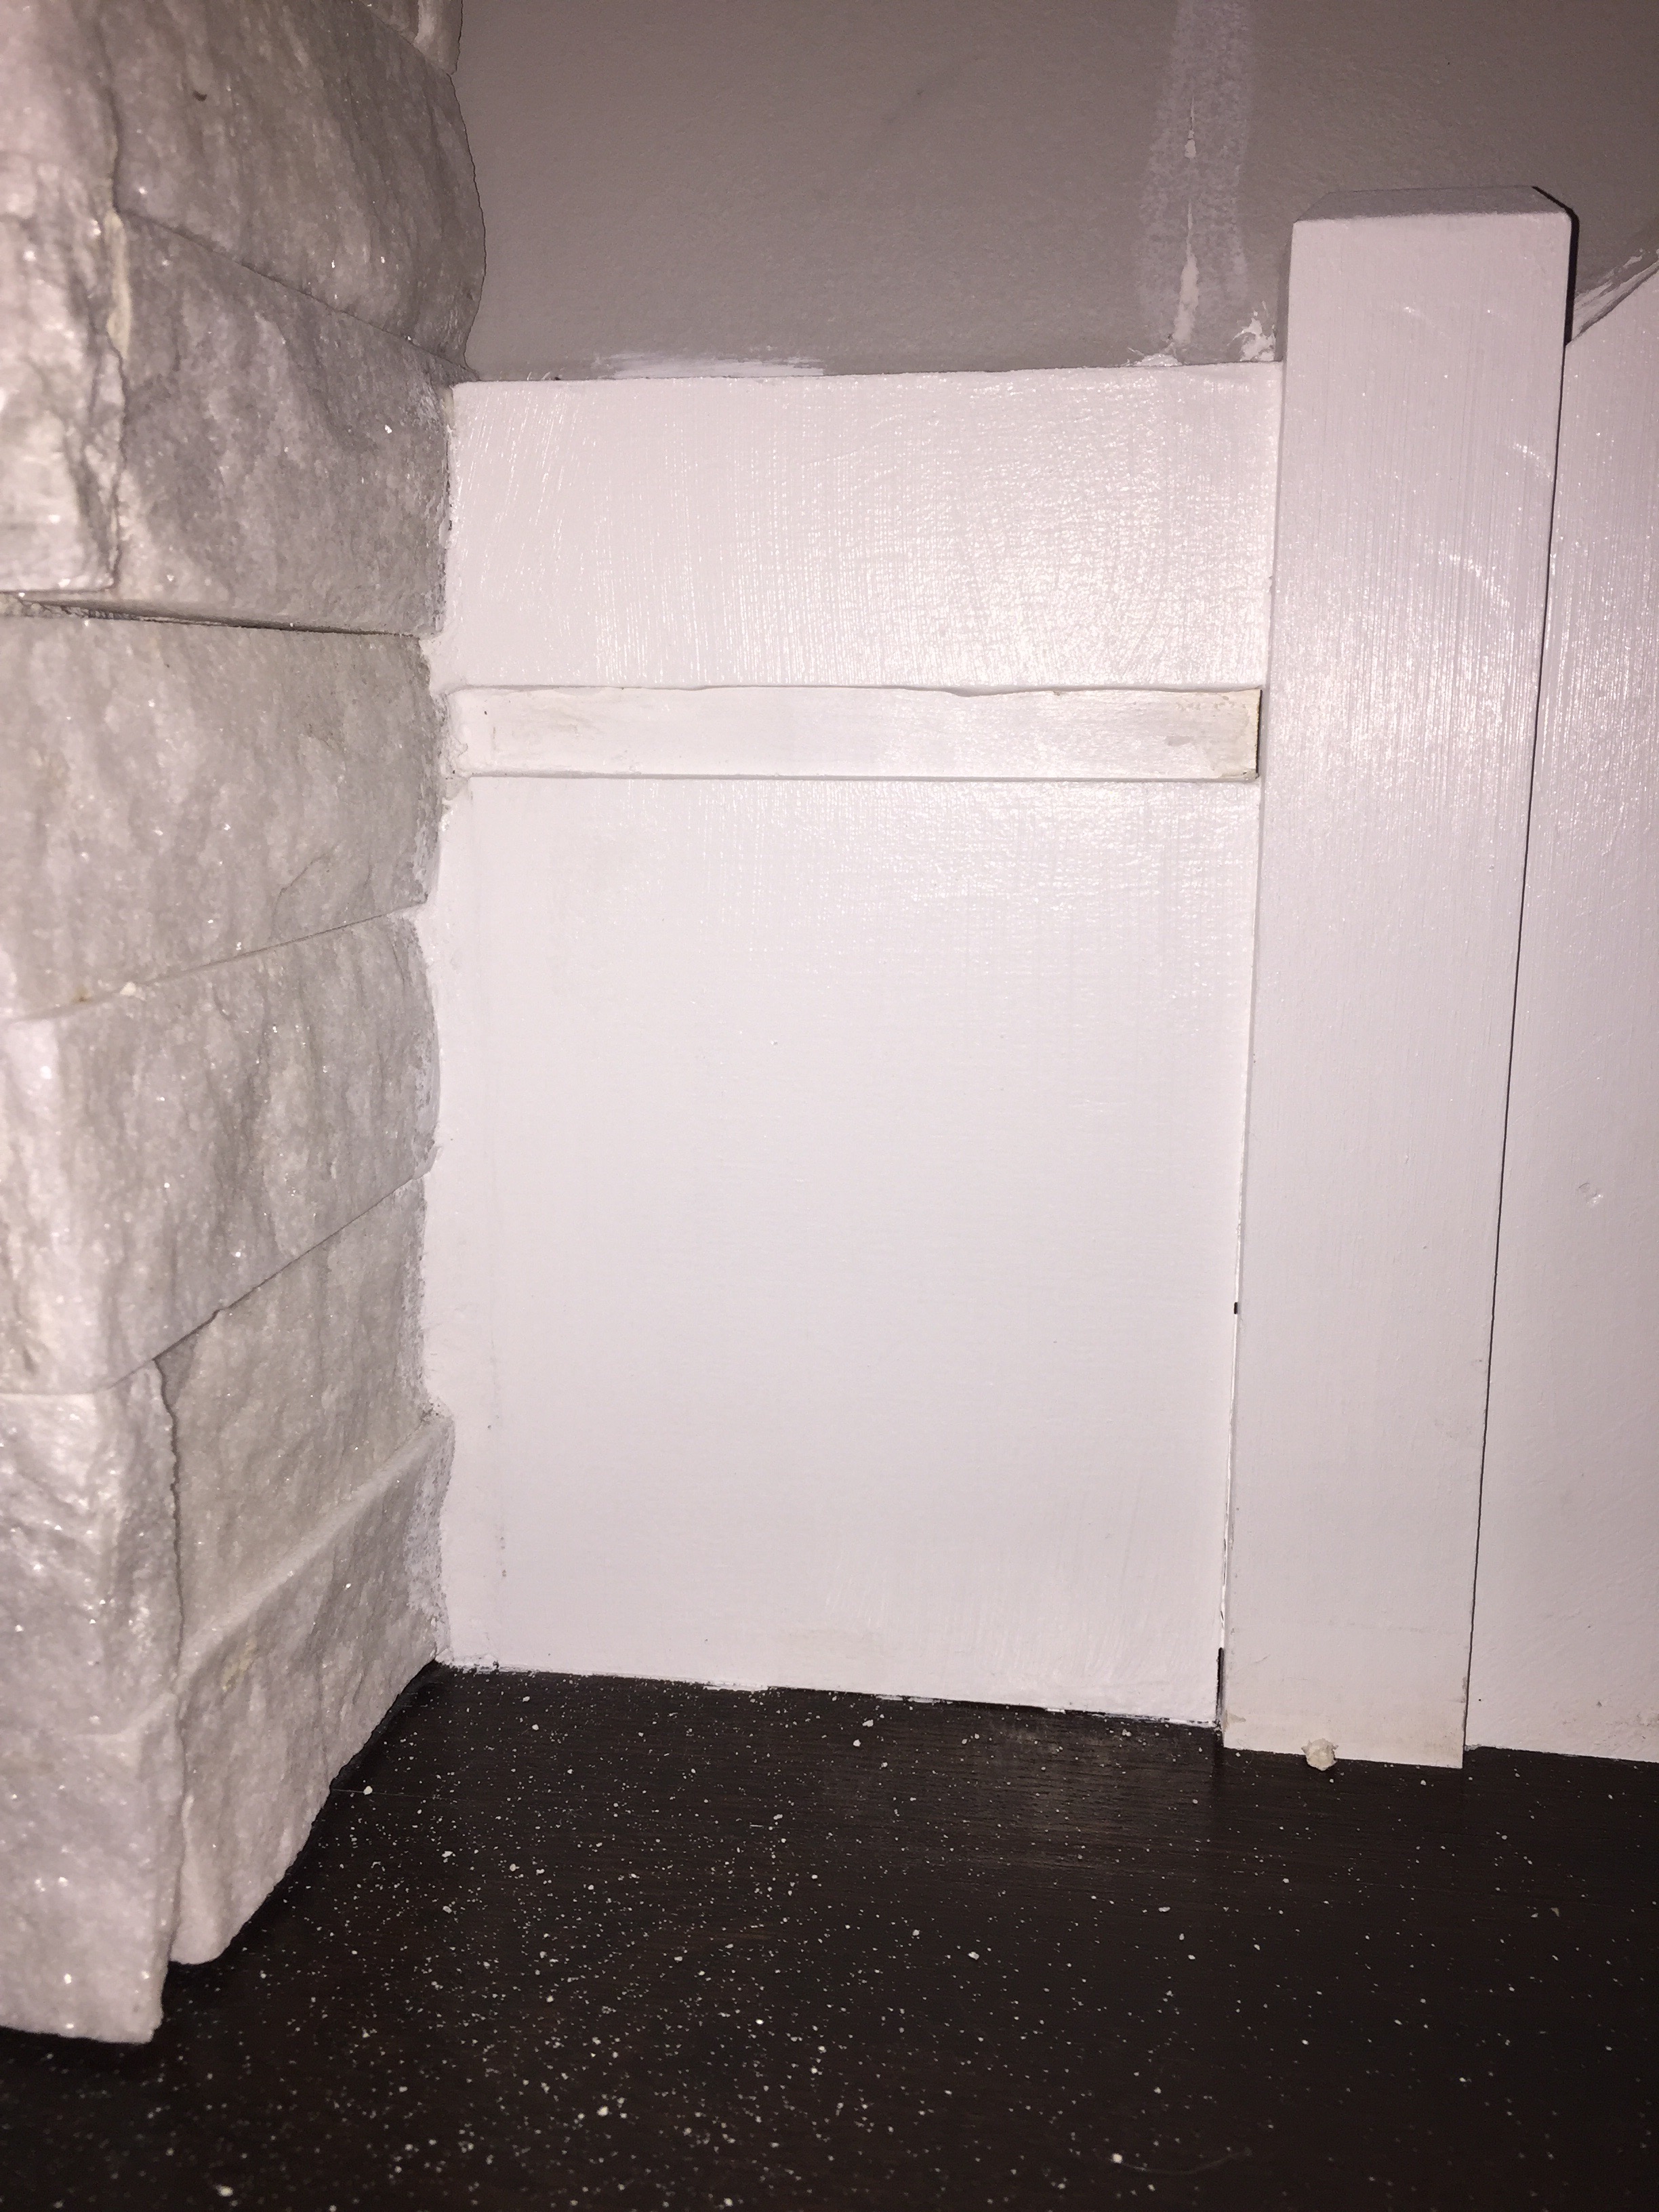
The next day, I installed the baseboards and patched around them. I SHOULD have traced the baseboard to the edges of the ledge rock but I didn’t. I applied a very thick layer of spackle for the initial application and waited 24 hours for it to dry. It needed 2 more coats of spackle before it was ready for caulk and paint. I always sand between coats too. When all is said and done, you won’t be able to tell that is wood and what is spackle, which is what makes spackle so amazing!
Initial application:

2nd coat:

3rd coat:
Paint:

See what I mean!
I use 3M Spackle & Primer because it is super easy to sand, dries hard, dries in less than 30 minutes, and is specialized for drywall. It also happens to be a rockstar on painted trim! I prefer to wait 24 hours to sand and reapply after the initial application because I want to make sure it is completely dry.
I also installed a tv mount for our flat screen television. I drilled through the rock and into a stud for maximum support. My amazing husband helped me place the tv onto the mount.
Although I really dislike tiling, this is a damn sweet wall. Now I need to figure out how to hang Christmas stockings on it…….and what is my next project?!


Can you tell me wheremthe cable box is. That is our dilemma at this point in designing our fireplace wall. Thanks.
LikeLike
Depending on the size of your cable box (and router if that’s your set-up), you may want to search for “cable box behind tv.” Best Buy sells a recessed box you can use, or there are brackets you can use like this one: https://www.amazon.com/HIDEit-Uni-SW-Mount-Black-Adjustable/dp/B00Y1NW07I/ref=asc_df_B00Y1NW07I/?tag=hyprod-20&linkCode=df0&hvadid=191941654061&hvpos=1o1&hvnetw=g&hvrand=15849083550945411872&hvpone=&hvptwo=&hvqmt=&hvdev=m&hvdvcmdl=&hvlocint=&hvlocphy=1019804&hvtargid=pla-302401998393&psc=1
Hope this helps!
LikeLike
Can the fireplace be removed if any repairs are needed down the road?
LikeLike
Technically, yes I have the ability with the fireplace I selected to remove the front glass, which gives access to the mounting screws.
LikeLike
How high from the floor to the fireplace and how many inches between the fireplace and TV?
LikeLike
I chose 18” off the floor
LikeLike
And 18” between the bottom of the tv and the fireplace
LikeLike
Hi! I’m so happy I found your page. I’ve been wanting to go this but I also have a door in my living room that would be next to the fireplace. I wasn’t sure how it would look in terms of balance, but yours looks great! Totally put my mind at ease 🙂
LikeLike
So sorry I am just seeing this now! It’s so funny you say that because I was so unsure of my design choice due to lack of examples on the internet too! I’m glad it gave you inspiration!
LikeLike
Curious on your corners. Did you purchase the corners from the manufacturer or did you make them yourself? If you made them, can you describe more the technique?
LikeLike
The corners came from the manufacturer.
LikeLike
Looks great. We have the same fireplace and deciding on the width of the stone wall. How many inches did you do of stone on each side?
LikeLike
The fireplace is wonderful isn’t it? We just framed up the surround from 2×4’s and attached hardieboard, so I believe it protrudes about 5” with the stone. The length of the surround is 60” fireplace + 6” on each side + width of the hardiest and stone = 74” +-
Hope this helps!
LikeLike
Hi there, you did an amazing job. I am currently looking to pick out the electronic fireplace. Which on do you have, what made you choose this one and do you like the way it works? Thanks!
LikeLike
I selected a Napoleon fireplace. I chose one that had a front facing blower, which enabled me to have a tv above. I had to search quite a bit for one that blew out the front, and finally settled upon Napoleon. I also was looking for one that was wider, so we went with a 50” wide one. I absolutely love this fireplace. It kicks out a ton of heat when needed, and we have the ability to adjust the flame colors to make it more realistic. It was a bit pricey though, which is the only downside-$900. Hope this helps you in your fireplace search!
LikeLike
Hi there just was thinking what are the cost to build this it looks nice
LikeLike
The cost to build is 90% the cost of the stone/tile/covering in the fireplace wall. Stone is typically more costly than tile, which can be more costly than say shiplap, or faux shiplap. Building the wall out of 2×4’s was less than $30.
LikeLike
Nicely done! One question, what about the heat that the fireplace emits? Is it inside the frame?
LikeLike
The heat from the fireplace is blown out the front of the fireplace. I selected this particular fireplace because I knew a tv was going to hang above and I couldn’t have heat blowing out the top. The heat from the fireplace is ample enough to heat my entire first floor though. I am more than impressed with that! Hope this helps you!
LikeLike
I’d love to be a part of group where I can get advice from other experienced people that share the same interest. If you have any recommendations, please let me know. Thank you.
LikeLike
Johnnie, have you ever checked out lumberjocks.com? It’s a forum-based site where you can post your project and ask for advice, or see others suggestions to member questions. I always go there for tool recommendations.
LikeLike
What brand fireplace did you choose?
LikeLike
I selected a Napoleon fireplace
LikeLike
I love this! Looking for something the doesn’t required a lot of depth. My question is where do you place/store the receiver for TV? I love the clean look you have accomplished just not sure where to practically place receiver??
LikeLike
Amber, I searched high and low for some kind of solution because I too thought the same thing! You can purchase a wall mount to hang behind your tv. I just googled “dvd wall mount behind tv” and there are tons of images and products to choose from. Hope this helps!
LikeLike
What type of stone is that ? Do you know the name ?
LikeLike
The stone is by MS International in “Arctic White” color.
LikeLike
What color is that stacked stone? Love it!
LikeLike
Arctic White by MS International
LikeLike